Servings: 10-12 slices | Prep Time: 25 minutes | Bake Time: 50-60 minutes | Chill Time: 4 hours (or overnight) | Total Time: About 5-6 hours
Two desserts walk into a pan — and they switch places in the oven. That is essentially what happens in the creamy chocoflan recipe, and honestly, it still blows my mind every single time I make it.
Chocoflan is also called the “impossible cake” because the chocolate cake layer and the flan layer magically swap positions during baking. You pour the cake batter first, top it with flan, and the flan sinks while the cake rises. Magic? Pretty much.
I made this for the first time three years ago and I was convinced I had ruined it. The layers looked wrong going into the oven. Coming out? Absolute perfection. If you want a showstopper dessert that does all the work for you, this is it.
What Exactly Is a Creamy Chocoflan?
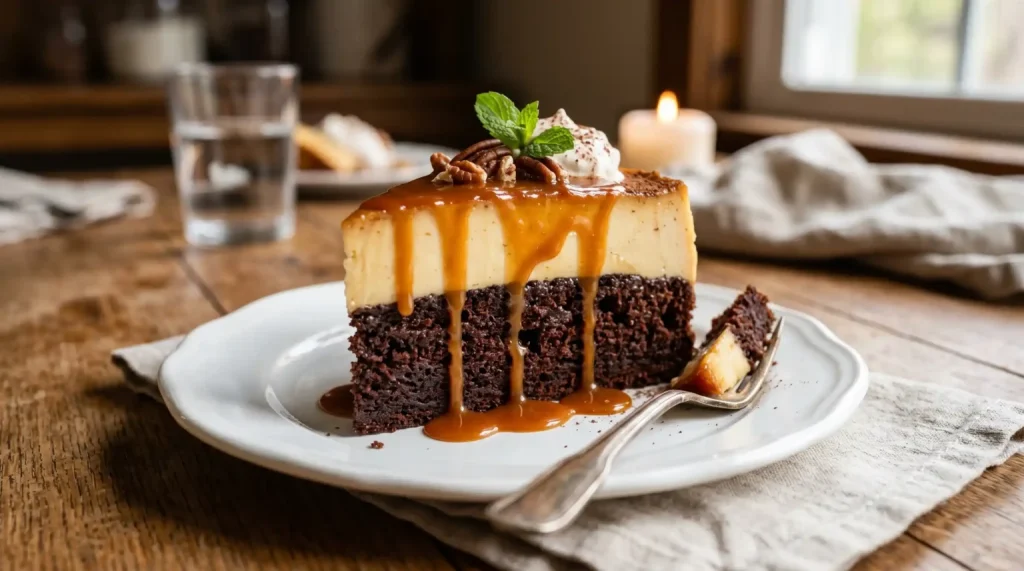
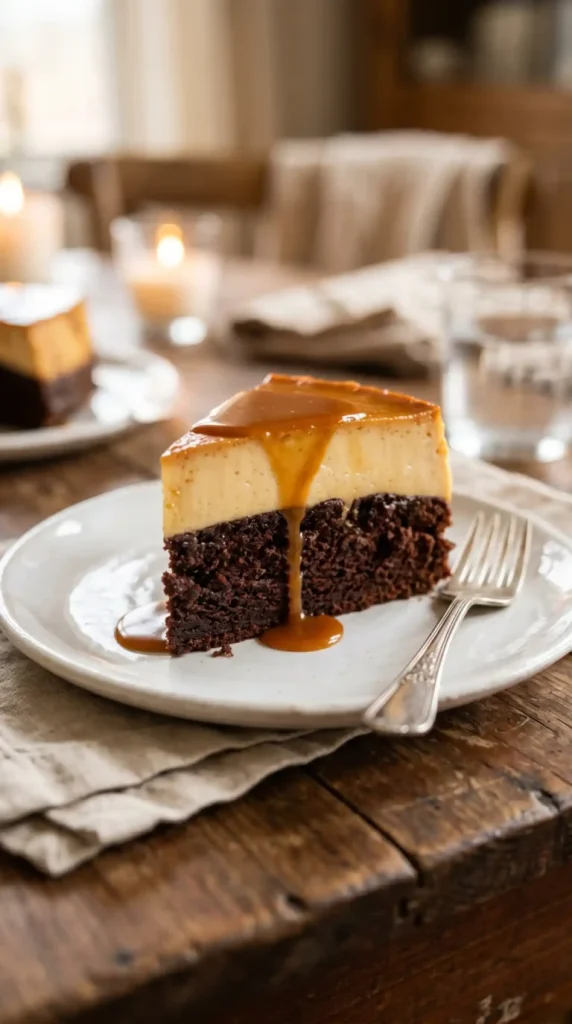
The creamy chocoflan is a Mexican-origin dessert that layers a rich chocolate cake base with a smooth, silky vanilla flan on top. The two layers bake together in a bain-marie — that is a water bath — and swap positions naturally during the baking process.
The result is a stunning two-layer dessert with a caramel sauce that soaks into both layers as the cake cools. You get chocolate richness on the bottom, creamy custard on top, and sticky caramel running through everything.
What makes this different from making two separate desserts? The textures complement each other beautifully. The dense, moist chocolate cake contrasts with the light, jiggly flan in the best possible way. FYI, this dessert is absolutely dangerous at parties.
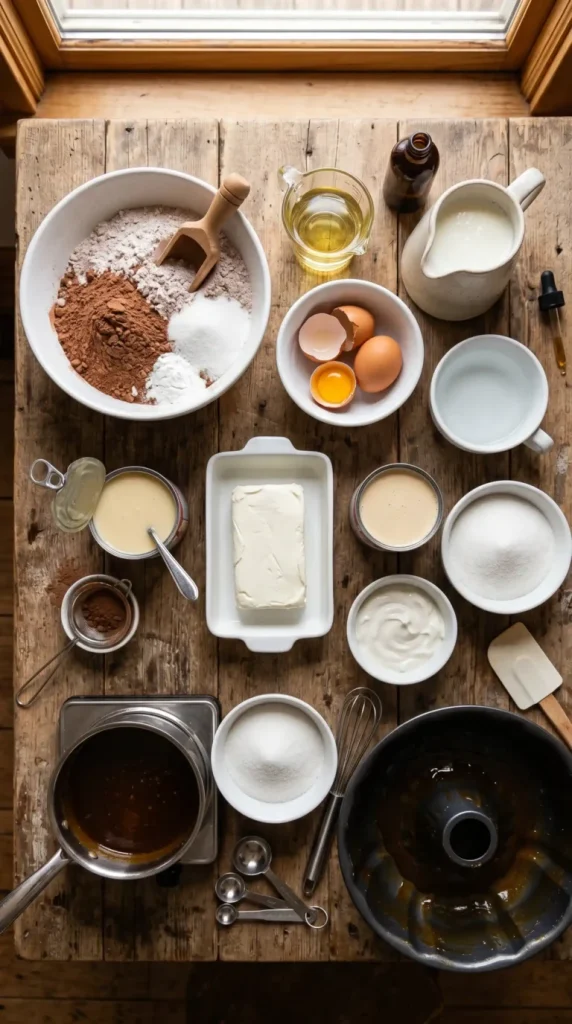
Ingredients
For the Caramel Layer
1 cup granulated sugar
1/4 cup water
For the Chocolate Cake Layer
1 box (15.25 oz) chocolate fudge cake mix
3 large eggs
1/2 cup vegetable oil
1 cup sour cream
1/2 cup whole milk
1 teaspoon pure vanilla extract
For the Flan Layer
1 can (14 oz) sweetened condensed milk
1 can (12 oz) evaporated milk
4 large eggs
2 teaspoons pure vanilla extract
4 oz cream cheese, softened to room temperature
1/4 teaspoon salt
Equipment You Need Before You Start
Getting your equipment ready before mixing anything saves a lot of stress. This recipe involves a water bath and a bundt pan, so a little prep goes a long way.
12-cup bundt pan: This is non-negotiable. The shape helps both layers set and unmold cleanly.
Large roasting pan: Your bundt pan will sit inside this filled with water for the bain-marie.
Blender: You need this to make the flan layer perfectly smooth.
Aluminum foil: For tightly covering the bundt pan during baking.
Cooking spray: Grease the bundt pan generously to avoid any sticking disasters at unmolding time.
How to Make Creamy Chocoflan — Detailed Step-by-Step
Let us walk through this together, one step at a time. I am going to be very specific so you feel confident at every stage of the process.
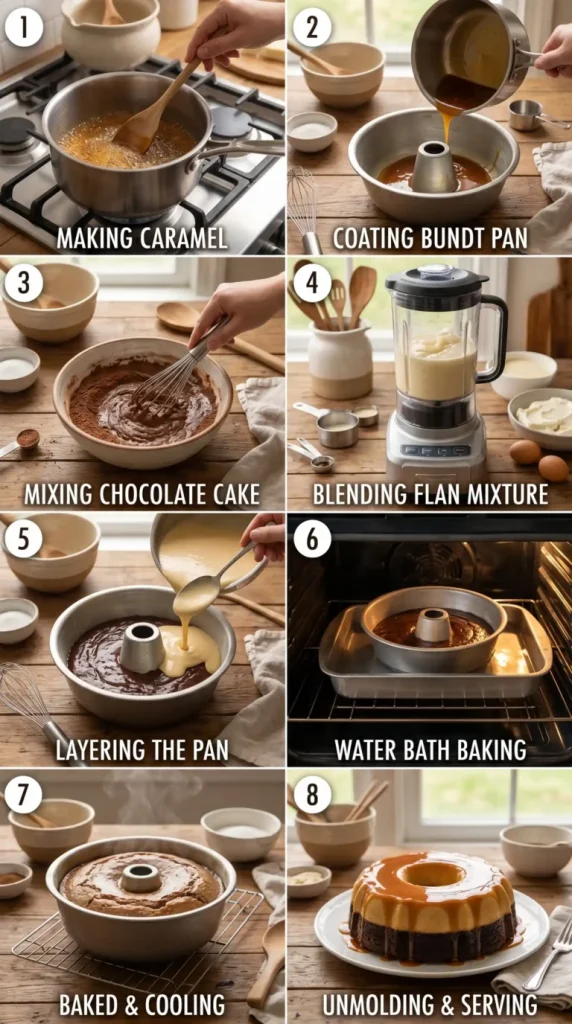
Step 1: Make the Caramel
Start with the caramel because it needs to cool and set in the pan before anything else goes in. Combine 1 cup of granulated sugar and 1/4 cup of water in a small, heavy-bottomed saucepan over medium heat.
Stir just until the sugar dissolves, then stop stirring completely. Swirling the pan occasionally is fine, but stirring causes crystallization. Watch the mixture closely — it will turn from clear to golden to a deep amber color.
Once the caramel reaches a deep amber shade, remove it from the heat immediately. Pour it carefully into the bottom of a well-greased 12-cup bundt pan. Tilt the pan gently to spread the caramel evenly across the bottom and slightly up the sides.
Let the caramel sit for about 10 minutes to harden. Do not rush this step. If you pour your batter over liquid caramel, it will mix and you will lose that beautiful defined layer. Patience here pays off later.
Step 2: Preheat the Oven and Prepare the Water Bath
Preheat your oven to 350 degrees Fahrenheit. Place a large roasting pan on the center rack of your oven and fill it with about an inch of hot water. This is your bain-marie setup.
The water bath is what makes the flan layer cook gently and evenly without cracking or becoming rubbery. Skip the water bath and you risk a curdled, pockmarked flan. Trust the process on this one.
Step 3: Mix the Chocolate Cake Batter
In a large mixing bowl, combine the chocolate fudge cake mix, 3 eggs, 1/2 cup vegetable oil, 1 cup sour cream, 1/2 cup whole milk, and 1 teaspoon vanilla extract. Beat everything together with a hand mixer or stand mixer for about 2 minutes on medium speed.
The sour cream is the secret weapon here. It makes the chocolate cake layer incredibly moist and dense, and it holds up beautifully under the weight of the flan during baking. The batter should be thick and smooth with no dry streaks.
Pour the chocolate cake batter evenly into the bundt pan over the hardened caramel. Use a spatula to spread it into an even, level layer. Do not press down hard — just smooth it out gently so it fills the pan uniformly.
Step 4: Make the Flan Mixture
Add the softened cream cheese to a blender first. Blending the cream cheese before adding the liquids ensures it breaks down completely without leaving any lumps in the flan. Give it a quick pulse or two on its own.
Now add the 14 oz can of sweetened condensed milk, the 12 oz can of evaporated milk, 4 eggs, 2 teaspoons of vanilla extract, and 1/4 teaspoon of salt to the blender. Blend everything together on high for about 60 seconds until completely smooth.
Stop the blender and check for any tiny cream cheese lumps. If you see any, blend for another 30 seconds. The flan mixture should look silky, pale, and pourable — almost like a thin cream soup. That smooth consistency is what gives you that luxurious texture after baking.
Step 5: Pour the Flan Over the Cake Batter
Here comes the moment that looks completely wrong but works perfectly. Slowly pour the flan mixture directly over the chocolate cake batter in the bundt pan. Pour gently and steadily in one spot — do not pour all around the pan.
The flan will sit on top of the cake batter at first. Do not stir, do not mix, do not panic. The layers will swap on their own during baking. The denser flan sinks as it heats and the cake batter rises around it. It is one of those beautiful food science moments.
Once all the flan is poured in, the pan will look almost full. That is totally normal. Cover the entire bundt pan tightly with aluminum foil, pressing the edges down to seal it well. This keeps steam in and helps both layers cook evenly.
Step 6: Bake in the Water Bath
Carefully place the foil-covered bundt pan into the roasting pan filled with water inside the oven. The water level should come up about halfway up the sides of the bundt pan. Add more hot water if needed before closing the oven door.
Bake at 350 degrees Fahrenheit for 50 to 60 minutes. Do not open the oven door before the 50-minute mark. At that point, insert a toothpick into the cake layer through the foil — if it comes out clean, your chocoflan is done.
If the toothpick still has wet batter on it, re-cover and bake for another 10 minutes, then test again. Every oven runs slightly differently, so the bake time can vary. The flan layer should feel set and not jiggly when you gently shake the pan.
Step 7: Cool and Chill
Remove the bundt pan from the water bath and set it on a wire cooling rack. Remove the foil and let the chocoflan cool completely at room temperature for about 1 hour. Do not try to unmold it while it is warm.
Once it reaches room temperature, cover the pan with plastic wrap and refrigerate for at least 4 hours. Overnight chilling gives the absolute best results. The layers firm up, the caramel loosens slightly, and the flavors deepen significantly during chilling.
Step 8: Unmold and Serve
Run a thin butter knife gently around the outer and inner edges of the bundt pan to loosen the cake. Place a large serving plate upside down on top of the bundt pan. Then, in one confident motion, flip the whole thing over.
Hold the plate and pan together firmly, take a breath, and invert. Lift the pan slowly. The caramel will flow beautifully down the sides of the chocoflan as it releases. If it sticks slightly, give the pan a gentle wiggle or tap the top with a spoon.
What you see next should be a gorgeous, glossy caramel-soaked chocoflan with the chocolate cake on the bottom and a silky flan dome on top. Slice and serve chilled for the best texture and flavor.
Tips for Perfect Results Every Time
Soften the cream cheese fully. Cold cream cheese creates lumps in the flan that never fully smooth out.
Do not skip the water bath. Baking the flan without steam leads to a rubbery, cracked custard layer.
Chill overnight if possible. Four hours is the minimum, but overnight chilling is where the magic really happens.
Grease the bundt pan generously. Use cooking spray and make sure every crevice is coated. Sticking is the number one unmolding problem.
Use a blender for the flan. A whisk will not break down cream cheese fully. A blender guarantees a silky smooth result.
How to Store Your Creamy Chocoflan
Store leftover chocoflan covered in plastic wrap or in an airtight container in the refrigerator for up to 4 days. The flavors actually get better on day two and three as the caramel continues to soak into the layers.
Freezing chocoflan is possible but not ideal. The flan layer can become slightly grainy after freezing and thawing due to the egg-based custard structure. If you must freeze it, wrap individual slices tightly and consume within 4 weeks.
Fun Variations Worth Trying
Can I make creamy chocoflan without a bundt pan?
You can use a 9×13-inch baking dish or individual ramekins. The bake time will change — ramekins need about 35 to 40 minutes and a rectangular pan needs about 45 to 55 minutes. The layer swap still happens, just in a different shape.
My flan came out with bubbles or holes. What went wrong?
Bubbles in the flan usually mean the oven temperature was too high or the water bath ran dry. Always bake at 350 degrees and check the water level halfway through. You can also strain the flan mixture through a fine-mesh sieve before pouring to remove excess air.
Can I make the creamy chocoflan recipe ahead of time?
Absolutely — and IMO this is actually the best way to serve it. Make it the day before, chill overnight, and unmold right before serving. The texture and flavor improve significantly with longer chilling. It is the ideal make-ahead party dessert.
Why does the cake go to the bottom and the flan end up on top?
Density is the answer. The flan mixture is denser and heavier than the aerated cake batter. During baking, the heat causes the cake batter to expand and rise through the flan, while the flan sinks below it. The result is a perfect layer swap every time.
Final Thoughts
The creamy chocoflan recipe is one of those rare desserts that looks wildly impressive but is surprisingly straightforward to make. Two layers, one pan, and a little oven science — that is really all there is to it.
Every single time I bring this to a gathering, people stop mid-conversation when they see it unmolded on a plate with caramel running down the sides. The combination of chocolate cake and silky vanilla flan never gets old. So pull out that bundt pan, grab your ingredients, and give this a try. You will spend about 25 minutes in the kitchen and end up with something that looks like it took hours. That is a trade I will take every single time